Cheesycam.com

How to achieve amazing catchlights in the eyes PT4

How to Achieve Amazing Catchlights in the Eyes PT4

Triangular Lights

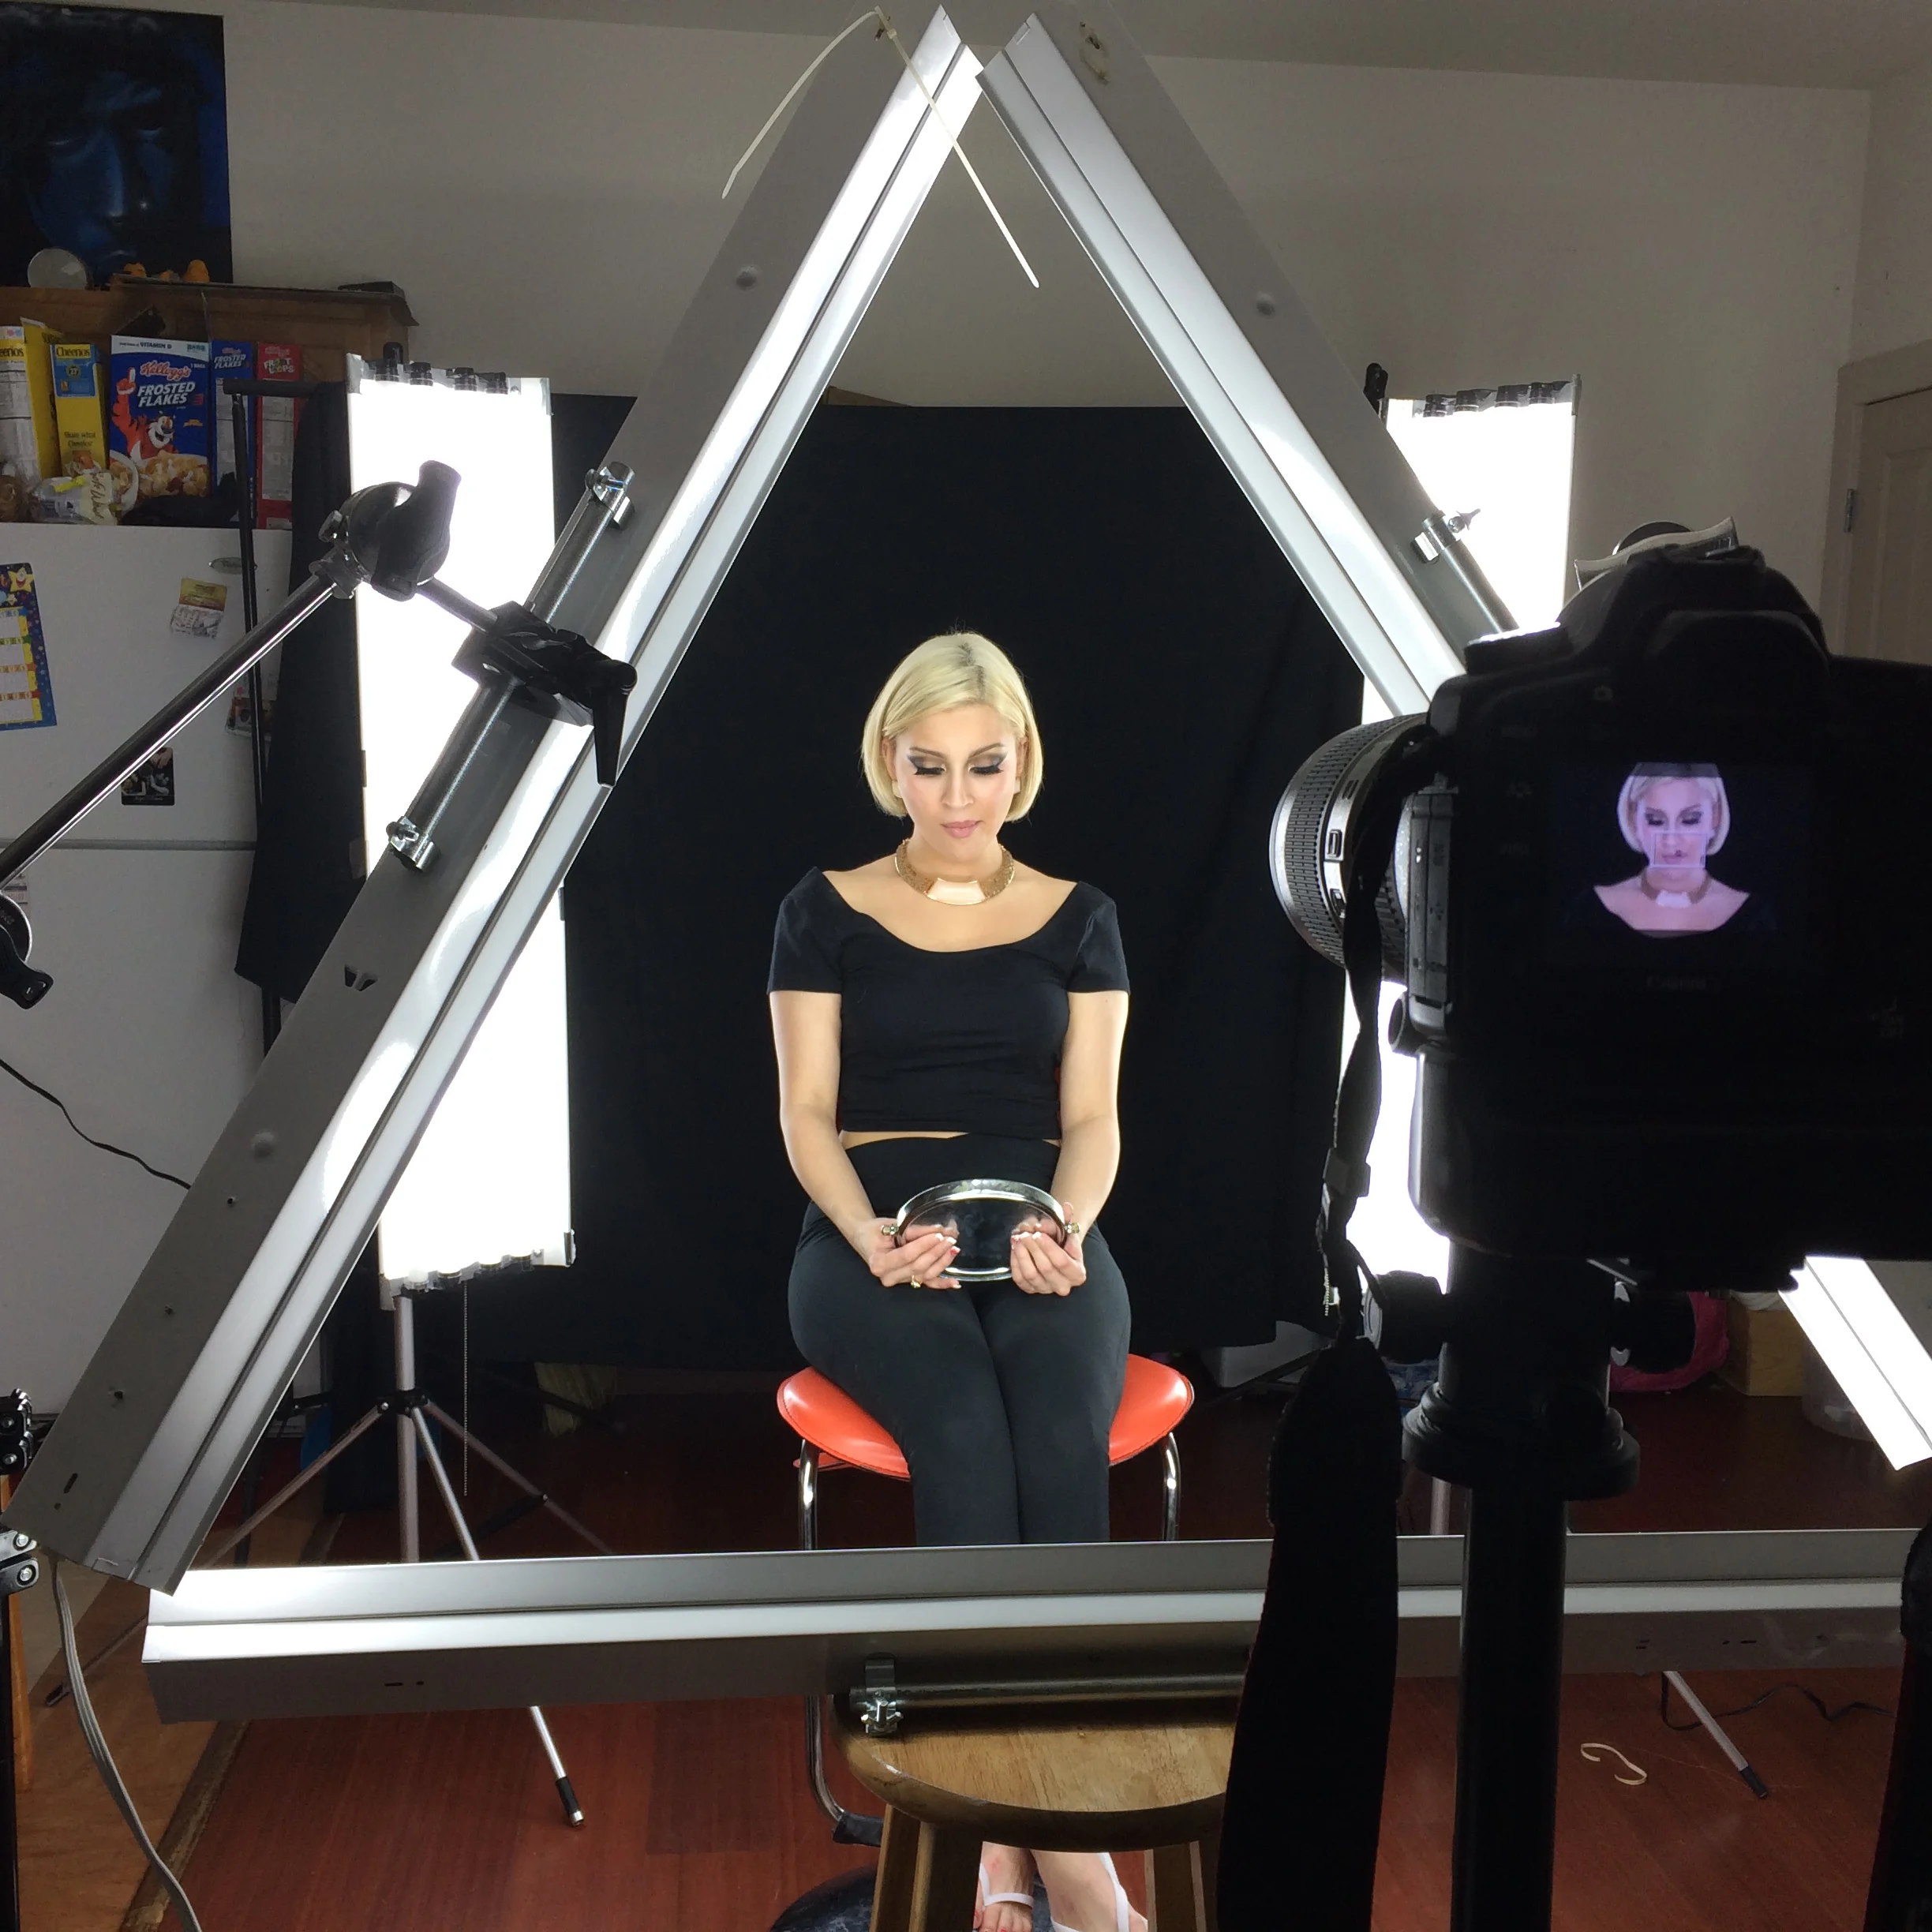
This is essentially a 3 light setup, but it actually took a total of 5 lights to construct this particular setup. In the middle we have the beautiful Eliza Lugo, she is the very model who starred in the first series of how to achieve amazing catchlights in the eyes. As you can see in the image Eliza is highlighted by (2) 4ft, Fluorescent lighting banks that are equivalent to 128watts each. The two side lights act as a rim light accentuating the contour of her body as well as creating some separation between the talent and the background. Moving along here’s where things get a little interesting, Lighting banksBecause Joe adamant did such a flawless job at constructing these lighting banks I told myself I would not make a video doing such however, because of the amount of inquiries I received in regards to constructing these lighting banks I figured I'll make a quick video.

DIY Fluorescent Lighting Banks

Lithonia Lighting hanging fixture

1/2"  Conduit hanger

1/4-20 wing nut

Flat washer #8

machine Screws #8-32x3/4"

machine Screws 5 1/4" 20x1/2"

#0 conduit hanger with speed thread

5’ Conduit pipe cut down to 4'

Satin white spray paint

Impact KCP-240

40" Extension Arm

KCP- 200

2.5" Grip Head

8" Baby Pin

IMG_0422.JPG

I captured Eliza doing her makeup

This is the Impact 40" Extension Pole with the 8" baby pin held by the Super "C" clamp.

"How to achieve amazing catch lights in the eyes Pt 1, 2, & 3"

Want to know what inspired it all?
A Little over two years ago I came across photographer Peter Hurley, whom I've fell in love with. He is arguably one of the most successful and well known Portrait Photographers of our time. I was just marveled and intrigued at how he built a foundation and style off of head shots with such a simplistic approach. As my interest in his work grew, I learned about his style of shooting, workflow, lighting, clients,  pricing, etc, being a portrait photographer myself all of this stuff resonated with me. I was on the www.FStoppers.com site and saw that the guys over at FS linked up with Peter to create "The Art Behind the Headshot" DVD which was amazing, that can be found here http://fstoppers.com/peter-hurley-the-art-behind-the-headshot Watching this was like watching a magician expose all of their secrets. Not to dive into the DVD too much but this guy was working magic literally transforming people right before your very eyes. Granted nothing is new under the sun but the fact that he was showing you his techniques and engaging with the audience in such a fashion made you say wow!          

A few months after watching the DVD, I had the honor and pleasure of meeting Peter at the 2012 FStoppers Photo Plus Party located at Peter's Studio in Manhattan. There was food, drinks, and a tone of amazing people.  I went from doing a little research on this guy, to buying his DVD, to actually meeting him in person. Man it was truly a humbling experience to be around such a noted photographer. He was so cool and down to earth I felt as if I was hanging out with a good old friend. He even complimented me by saying I was by far the best dressed person of the night. You talk about a confidence booster that went straight to my ego just kidding lol. The ambiance of it all had me so pumped and excited. By the end of the night I was even more intrigued.

That interest led me on a hunt to obtain those magical fluorescent lights that Peter uses, which are Kino Flo Lights http://www.bhphotovideo.com/bnh/controller/home?O=&sku=258951&gclid=CLe_mMGWjL0CFQ8OOgoduTwAcQ&Q=&is=REG&A=details. I was quickly derailed when I discovered that those Kino Flo Lights were close to 3k a pop for a kit. Looking at those prices in lesser terms paralyzed me, because I knew they were way out of my budget. Instead of getting all depressed, my next best thing was to find an alternative, like my mom always says, "There are many ways to skin a cat." She was absolutely right, because I came across a photographer by the Joe Eldleman who did a fabulous DIY build with some fluorescent lighting banks that can be found here https://www.youtube.com/watch?v=OBPDSBCoN2c After watching his video over 50 times, I took note of everything I needed to do in order to build these lights, and I made it happen. My particular set up slightly varies from Joe Edelman's, however it shares the same principles and mechanics. It feels good to receive, but it feels even better to give back and that's exactly what I was set out to do. I was inspired to share my build and the awesomeness I was creating with it and this is how I came up with "How to achieve amazing catch lights in the eyes series."  You know it still amazes me what you can create with $350 and some appliances from Home Depot. I want to give a huge shout out to Peter Hurley and Joe Edelman for all of their "AWESOMENESS", it's people like these guys who give birth to people like me!  

Showing off that head shot intensive pose!

Showing off that head shot intensive pose!

"How to achieve amazing catch lights in the eyes Pt.1

Big shout out to Emm for posting my video on his Blog http://cheesycam.com/ this is an excellent source for photographers and videographers. I can not say enough good stuff about this site, please go check him out!! 

These photos were inspired by Joe Edelman's video Big shout out to this man for posting this video and helping us all out!!!  DIY Fluorescent Photography Studio Lighting" http://www.youtube.com/watch?v=OBPDSBCoN2c

Photographer: Lorenzo Pickett 
Model: Eliza L
Music: "Fell Apart" Produce by Lorenzo Pickett 
Slide Show: Animoto 
 

Light It Magazine published one of my images as the closing shot in their November's issue, they also used it in the December best of 2012 issue!! Super excited about that!! What a way to end off the year! Go Check it out, and you will see it in there!! 

This is some what of an unofficial BTS of my last shoot with model Eliza. 
As I mentioned in the video I don't have the resources to give you guys an actual walk through of how I achieved these shots. 
So I put together a short clip then added some photos and explained my layout!! 
This set up is dummy proof you really can not go wrong shooting with this particular lighting setup, each and every time you will get consistent results. 

Camera: 
5D MarkII Lens 70-200mm is f2.8

Camera Settings:
F2.8, Shutter 1/1000, ISO100  200mm    
Lighting:
I constructed the two 4ft Fluorescent banks myself with appliances from Lowe's 120w each 
18in Diva Ring light 500w
I had the ring light for a while but never really used it. I wanted to use the ring light on this shoot but I wanted to use it in an interesting way so I got the idea to pair it with the 4ft lighting banks and it worked so well.

Post:
Bumped up: contrast, and vibrancy
Spot healing: to remove unwanted spots.
Clone stamp: blemishes and even skin tones.
Vignetting: darken the outer perimeter of the photo.  
Color Adjustment: to get a bluish tint in the color photos. 
Sharpen and Clarity: I used this mostly on the eyes to give them definition. 
Dodge and Burn: to lighten and darken areas of the photo

RightLight $165
http://www.ebay.com/itm/140674273995?ssPageName=STRK:MESINDXX:IT&_trksid=p3984.m1436.l2649

BackDrop $8 a yard http://www.amazon.com/Rosette-Satin-Blue-Munsell-Fabric/dp/B006ERRPLK/ref=wl_it_dp_o_pC_nS_nC?ie=UTF8&colid=37Y5XY1Z7IEBC&coliid=I38U3EHDSF49DZ

"How to achieve amazing catch lights in the eyes Pt.2

Photographer: Lorenzo Pickett 
Model: Julius 
Music: Produced by Lorenzo Pickett
 

This video was shot handheld using the iPhone5

I explained how using a ring light with some fluorescent lighting can get you some great photos. In this BTS video I show how I achieved the #poundsign catchlight in the eyes. I've seen photographers such as Lindsay Adler use this technique. Achieving interesting catch lights in the eyes is not as hard as it appears to be, it just takes a little of experimenting and tweaking. I thought to use a male this time around for my subject just to show you guys this look can look great on almost anyone. 

This setup is dummy proof you really can not go wrong shooting with this particular lighting setup, each and every time you will get consistent results. 

Camera: 
5D MarkII 
Lens 
70-200mm is f2.8
Camera Settings:
F2.8, Shutter 1/320, ISO100 Focal length 200mm. Subject distance 1.5m

Lighting:
Two 4ft, 4tube Fluorescent banks
Two 4ft, 2tube Fluorescent banks

How to achieve amazing catch lights in the eyes Pt.3

So here it is guys pt3 to "How to achieve amazing catch lights in the eyes. 
To see more photos from the session just swing over to my website!! 

Photographer: Lorenzo Pickett 
Model: Odemarys Olavarria 
Music: "December 10th" Produce by Lorenzo Pickett 

Shooting Settings

White Balance: Auto 
Shutter: 1/100
F/Stop: 2.8
ISO: 100
Focal Length: 170mm

Camera Gear
5D MarkII 
70-200mmF/2.8 USMII
64GB Transcend CF Card
Tripod Gitzo G 2220
Avenger D520L 40" Extension Pole 
http://www.amazon.com/Avenger-D520L-40-Inch-Extension-Chrome/dp/B00127U9X8/ref=sr_1_1?ie=UTF8&qid=1393418750&sr=8-1&keywords=avenger+d520
Avenger D200 Grip Head
http://www.amazon.com/Avenger-D200-2-5-Inch-Grip-Chrome/dp/B001B1G3IK/ref=sr_1_1?ie=UTF8&qid=1393418789&sr=8-1&keywords=avenger+d200
Avenger E650 Baby Pin 8"
http://www.amazon.com/Avenger-E650-6-Inch-Collar-Silver/dp/B001AXKY70/ref=sr_1_1?ie=UTF8&qid=1393418929&sr=8-1&keywords=avenger+baby+pin
Manfrotto Super Clamp
http://www.amazon.com/Manfrotto-035RL-Super-Clamp-Standard/dp/B0018LQVIA/ref=sr_1_1?ie=UTF8&qid=1393418984&sr=8-1&keywords=super+clamp
 

Lighting
18' Diva Ring Light 500w
http://www.amazon.com/Photo-Video-Fluorescent-Ring-Light/dp/B00B64G2A6/ref=sr_1_2?ie=UTF8&qid=1393418673&sr=8-2&keywords=diva+ring+light
Lithonia Lighting Shop light: 
4' Fluorescent lighting 2 Tube Housing 64w 
http://www.homedepot.com/p/Lithonia-Lighting-2-Light-White-T12-Fluorescent-Shoplight-1233-SHOPLIGHT/203081577
4' Fluorescent lighting 4 Tube Housing 128w
http://www.homedepot.com/p/Lithonia-Lighting-4-Light-Grey-Heavy-Duty-Shoplight-1284GRD-RE/202968125

Rokinon 24mm F1.4 Prime

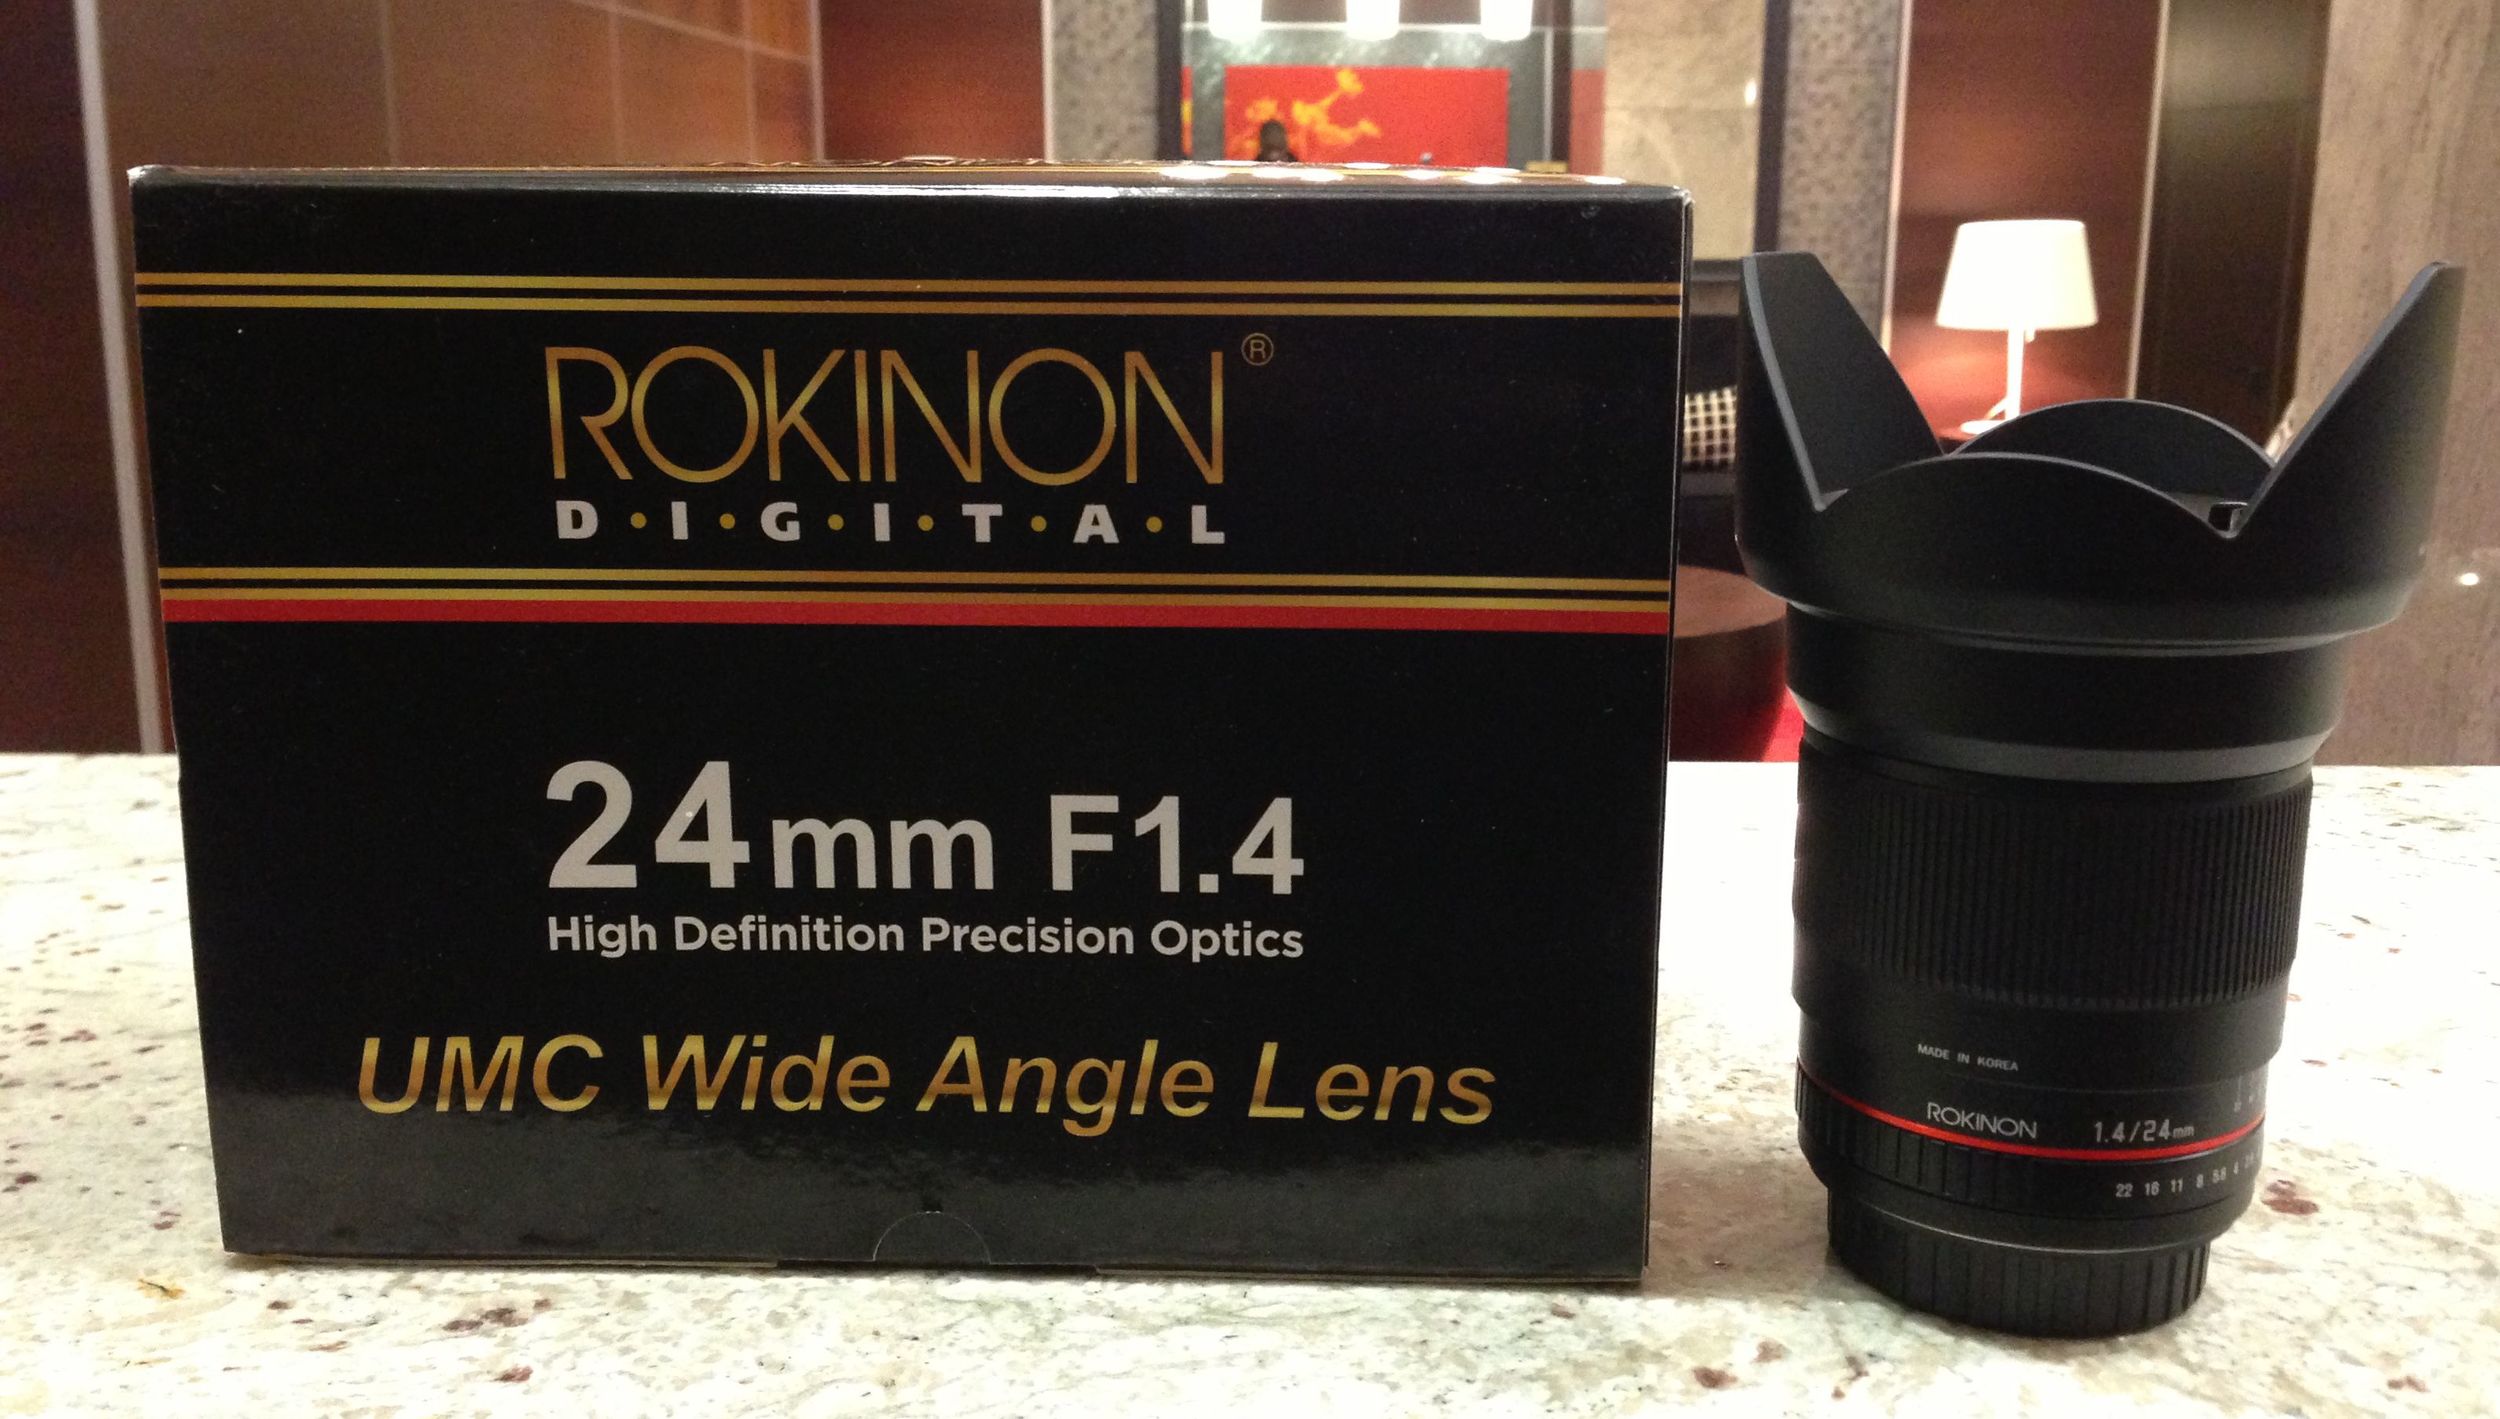
 I just acquired the #Rokinon 24mm F1.4 lens, this my 3rd Rokinon Lens, and I must say I am pretty excited about it!  Over the past year or so I have become a fan of the Rokinon brand. I first came across the Company after reading a post on the #Cheesycam.com blog. I was curious enough to take a chance, and I am glad I did. After being surprisingly pleased with the #Rokinon14mm2.8, I dove head first on the #R85mm1.4. Absolutely loving the performance of these two lenses I felt it was only right to purchase the #R24mm1.4. I always wanted to own a 24mm #Prime, but the #Canon equivalent is $1,550, That was way out of of my price range. Emm the founder of Cheesycam posted the R24mm1.4 originally priced at $800 for a limited time it was on sale for $500. I couldn't believe it I just had to buy this lens!!! Although these are manually focused lenses for the price point and the sheer quality you can not go wrong!!

Pros: Fast, Sharp, Creamy Bokeh, Wide, Solid Build, Superb Image Quality

As for now I do not have any Cons but if I do I will update this post!!

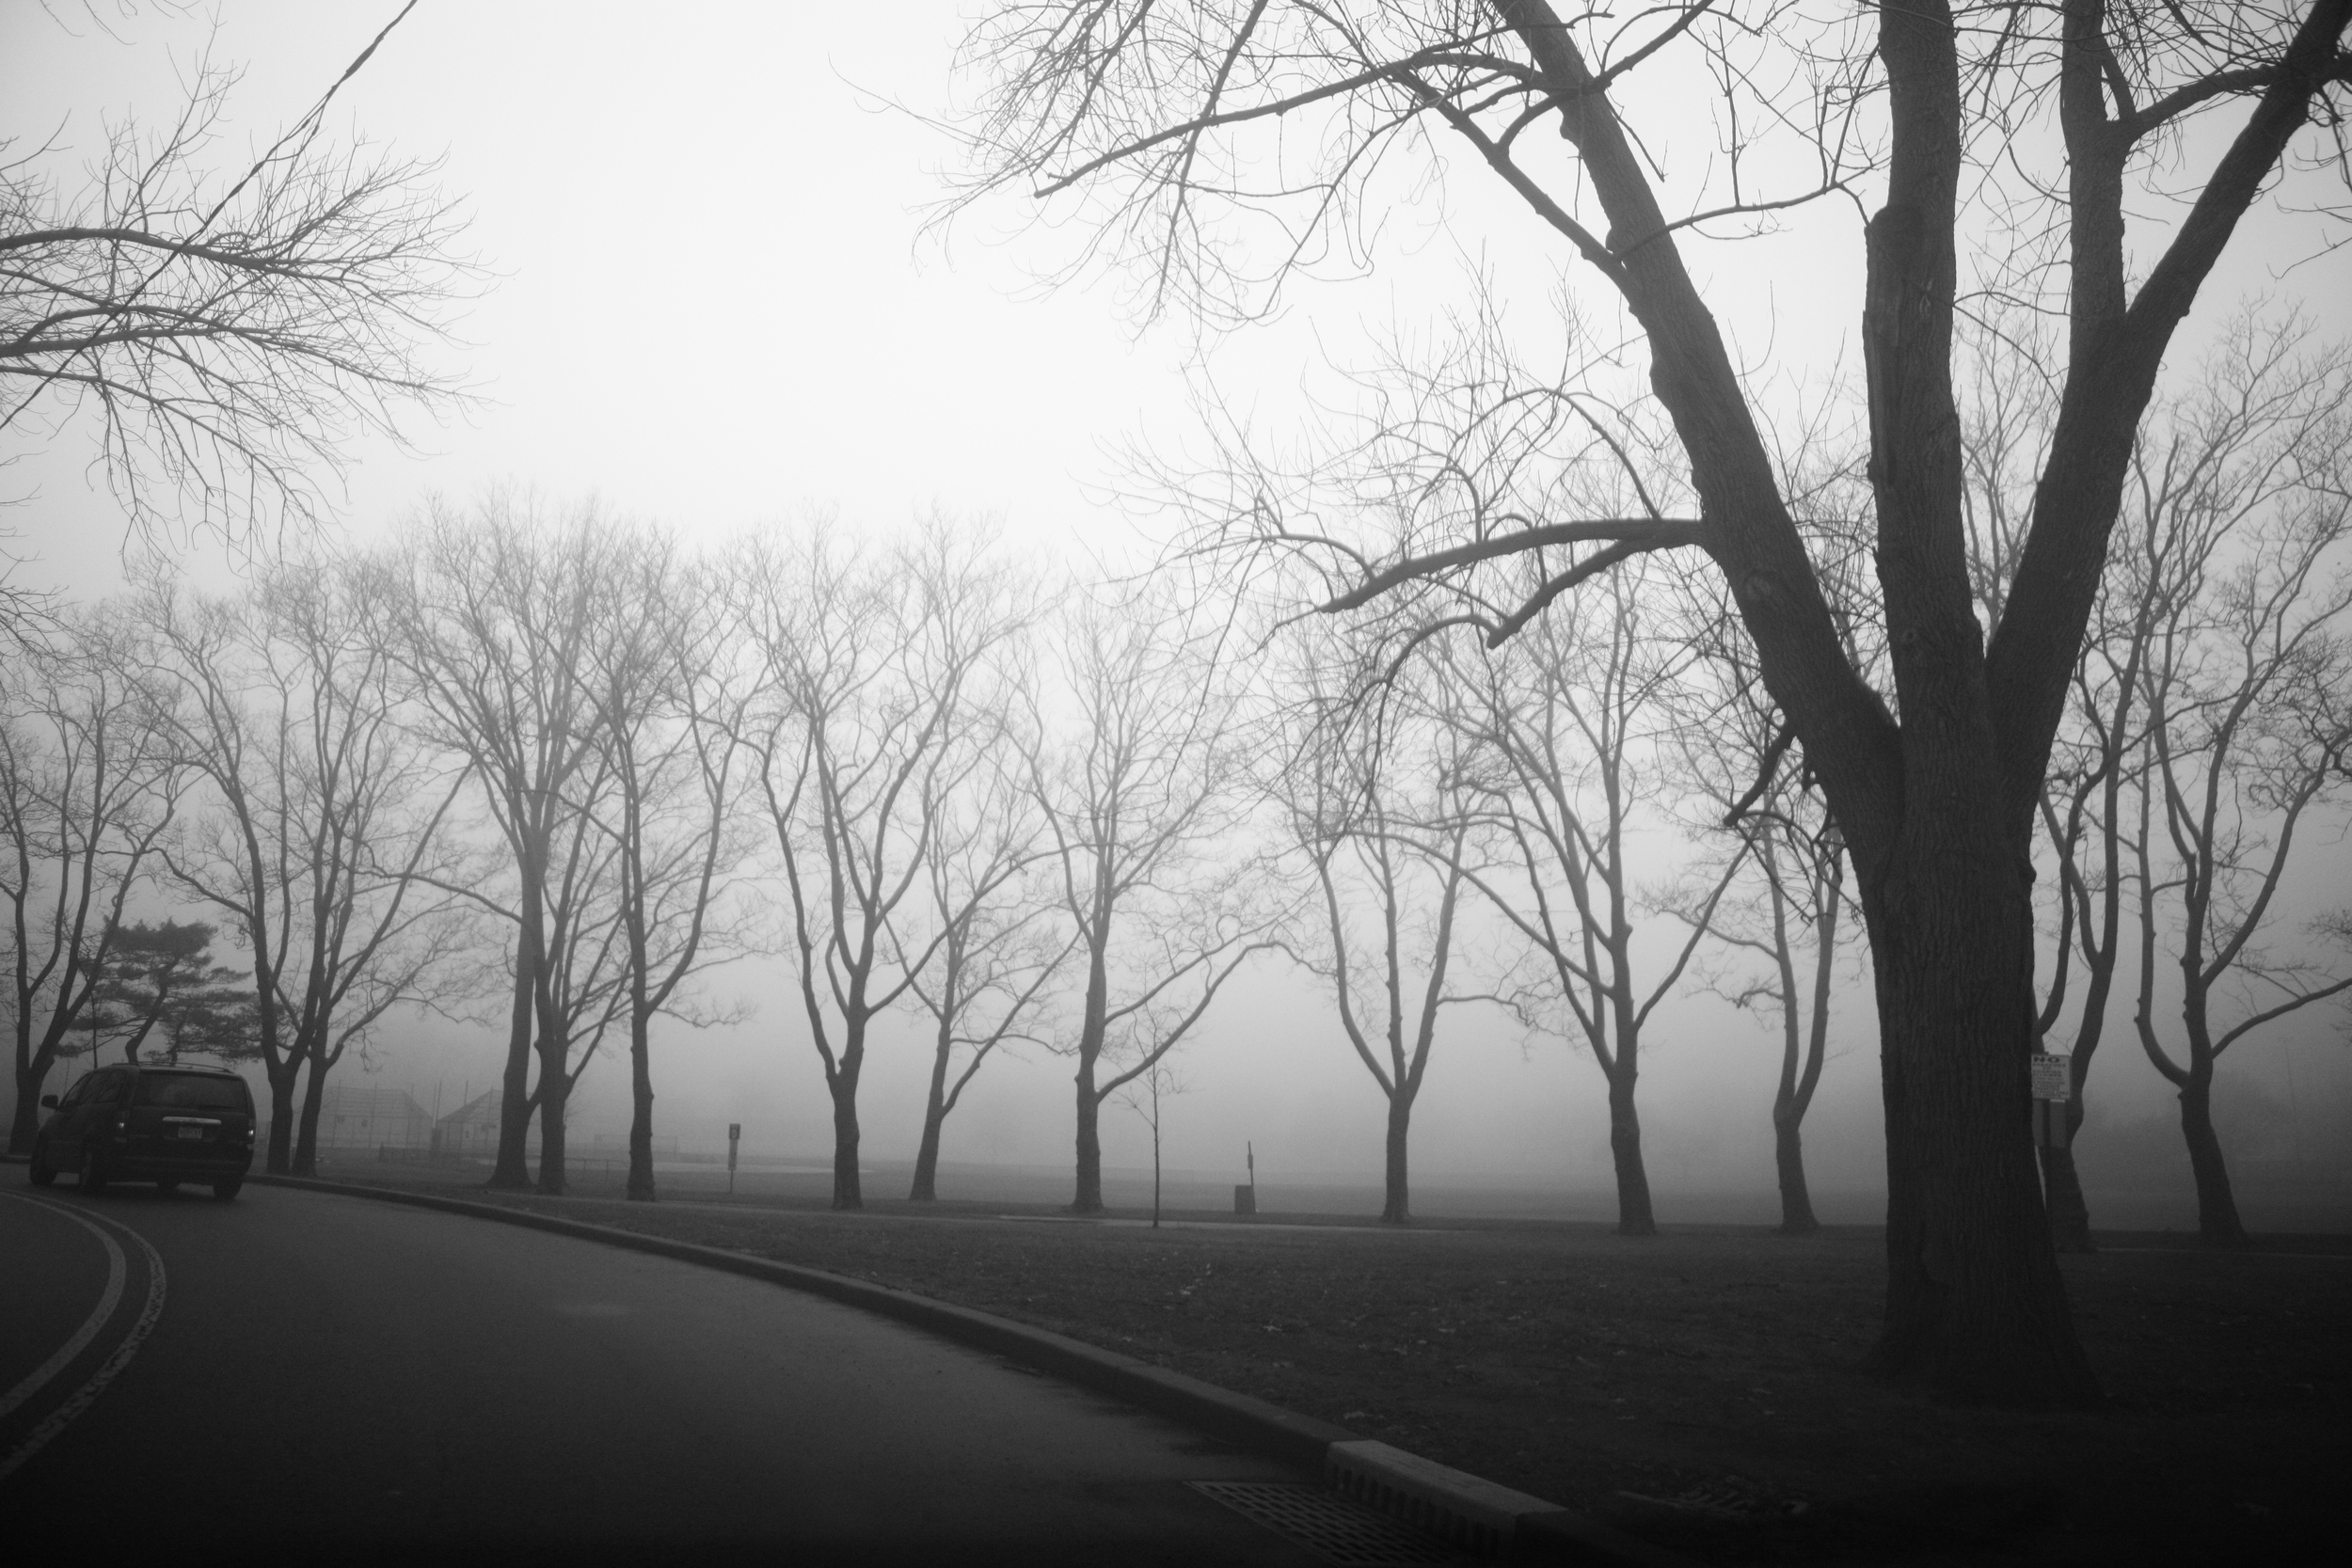
Here are a few images shot with this lens fresh out of the camera!! 

Fresh out of the box! 

Fresh out of the box! 

Top of the Glass

Top of the Glass

R24mm1.4 Mounted on my Canon 5D MarkII

R24mm1.4 Mounted on my Canon 5D MarkII

This was shot at 1.4, Pretty darn impressive if you ask me!!!

This was shot at 1.4, Pretty darn impressive if you ask me!!!

I took it out on a little test this was shot from inside of my car.

I took it out on a little test this was shot from inside of my car.

_MG_9261.JPG
_MG_9924.JPG
_MG_9945.JPG
_MG_9958.JPG
_MG_9932.JPG